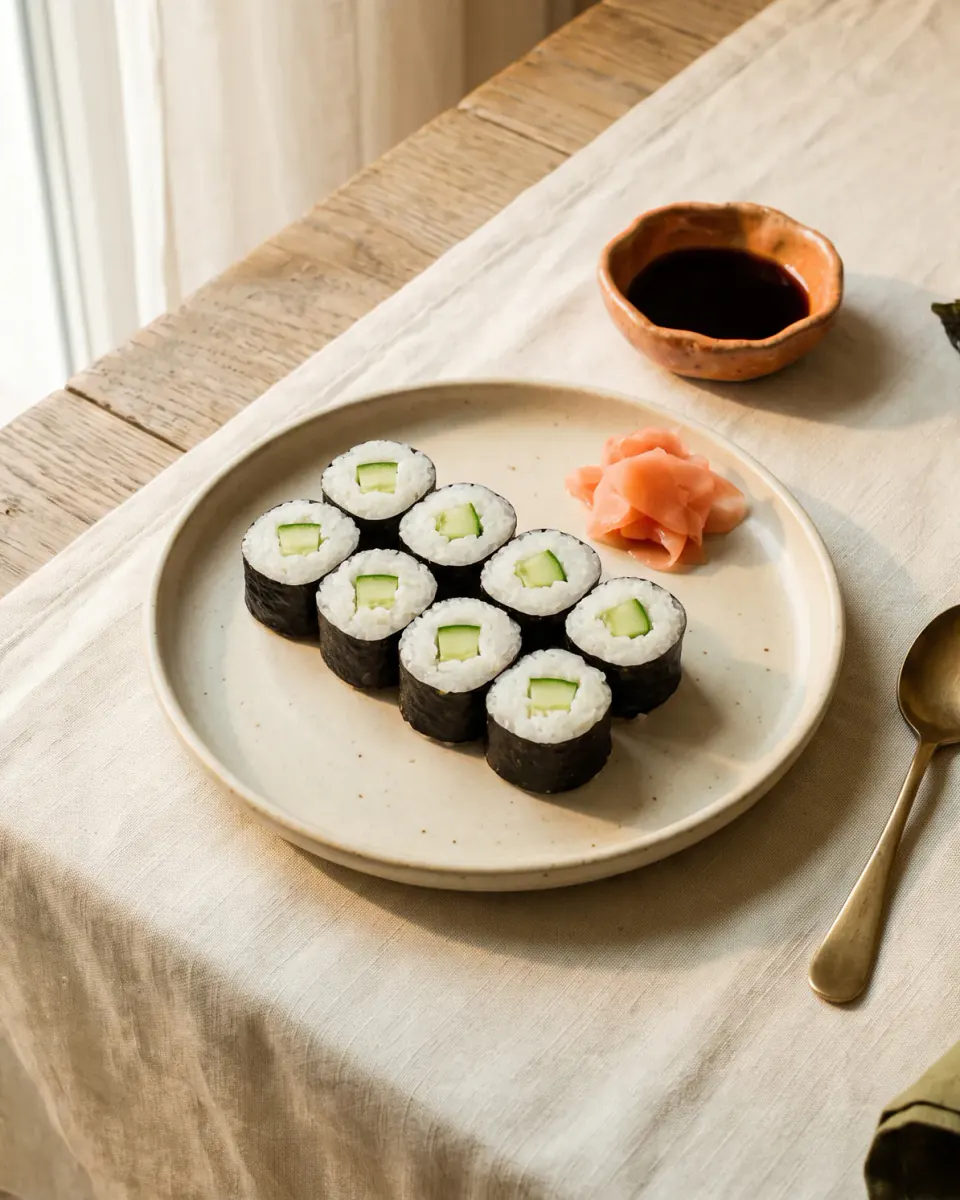
Cucumber Maki Rolls
Everyone starts with these, and not because they are a beginner's roll but because there is nothing to hide behind. Every mistake shows: too much rice and the nori will not close, too little pressure and it falls apart under the knife. Learn these and a California or a Philadelphia works first time.
- Prep
- 30 min
- Total
- 30 min
- Servings
- 6
- Level
- Easy
- Per serving
- 190 kcal
Ingredients
Makes: 6 rolls of 8 pieces, 48 in all
Shopping list
The ingredients for the servings you chose — copy them or send them to a messenger. Tick what you already have at home: only the rest goes on the list.
Method
-
Step 1: Cut the cucumber
Quarter the cucumber lengthways and cut away the watery seeded core — that is what makes a roll wet inside. Cut the flesh into long batons about as thick as a pencil, roughly 5 mm.
-
Step 2: Set your place up
Wrap the bamboo mat in cling film so rice cannot work its way between the slats. Put a bowl of water with a spoonful of vinegar in it beside you: wet hands are the only thing that stops the rice sticking to your fingers.
-
Step 3: Spread the rice
Lay half a sheet of nori rough side up, long edge towards you. With a wet hand take 80 g of rice and spread it in a thin even layer, leaving a 1 cm strip bare along the far edge. Do not pack it down: the rice should sit there, not be pressed.
-
Step 4: Lay the filling
If you like heat, run a thin line of wasabi across the rice. Lay the cucumber batons in a single row a third of the way in from your side — not down the middle, or the filling ends up off-centre once you roll.
-
Step 5: Roll it
Lift the near edge of the mat with your thumbs, holding the filling in place with your fingers, and fold it over the filling so the nori edge lands just beyond it. Pull the mat back and squeeze — evenly along the whole length, no jerking. Roll on to the end and leave the seam underneath.
-
Step 6: Let it set
Leave the finished roll seam side down for 2 minutes. The bare strip of nori takes up moisture from the rice and seals itself — no glue, no water needed.
-
Step 7: Cut with a wet knife
Wet a long sharp knife and cut the roll in half, drawing the blade back and then pushing it forward rather than using one long stroke, which stretches the roll. Put the halves side by side and cut each into four. Wet the blade before every cut.
Tips & variations
-
Tip
80 g of rice on half a sheet is less than feels right. That is exactly why most home rolls will not close: people use twice as much and the nori simply cannot meet.
-
Variation
The same technique makes the other thin rolls: a strip of avocado, a strip of sweet pepper, a baton of pickled daikon (that one is called shinko maki). Always one filling — nothing more fits in a hosomaki.
-
Swap
No bamboo mat is no obstacle: take a hand towel folded in two, wrap it in cling film and roll on that. It holds the shape less well, but it works.
-
Storage
Rolls are eaten the same day and do not go in the fridge: cold sets the rice and damp nori turns rubbery. If they have to wait an hour or two, cover them with a damp cloth and leave them at room temperature.
-
Tip
Nori has to stay dry until the last second. An open sheet takes up moisture from the kitchen air within half an hour and stops being crisp — take out only as many as you are rolling now.
Nutrition
| 1 serving | Whole dish 6 servings | |
|---|---|---|
| Energy | 190 kcal | 1,140 kcal |
| Protein | 4 g | 24 g |
| Fat | 1 g | 6 g |
| Carbohydrates | 41 g | 246 g |
Approximate values calculated from standard ingredient data.
Cooked it? Rate the recipe
No ratings yet — yours will be the first.